


Mounting a Metered Rack Mount PDU in a rack involves aligning the unit with the rack’s vertical rails and securing it using screws or brackets. Proper installation enhances safety and efficiency in power distribution. Essential tools include a screwdriver, level, and measuring tape, along with the necessary mounting hardware.
Key Takeaways
- Gather essential tools like screwdrivers, measuring tape, and cable ties before starting the installation. This preparation ensures a smooth and efficient process.
- Check the rack’s dimensions and environmental conditions to ensure compatibility with the PDU. Proper preparation enhances safety and equipment longevity.
- Follow a step-by-step approach for mounting the PDU, including securing brackets and managing cables effectively. This practice improves organization and power distribution efficiency.
Tools and Materials Needed
To successfully mount a vertical PDU in a rack, gather the following essential tools and materials:
- Screwdrivers: Both flathead and Phillips screwdrivers are necessary for securing the PDU.
- Measuring Tape: This tool ensures accurate fitting within the rack.
- Cable Ties or Velcro Straps: Use these for effective cable management, keeping the setup organized.
- Rack Mounting Brackets: If the PDU does not come with pre-installed brackets, secure ones are crucial for stabilization.
When it comes to materials, consider the following recommendations for a secure installation:
- Mounting Brackets and Fasteners: Always use the provided hardware for a reliable attachment to the rack.
- Toolless Mounting Options: These can facilitate quick and accurate positioning, saving time during installation.
- Robust Metal Shells: Choose PDUs with strong metal casings for physical protection against damage.
- Anti-Flaming PC Materials: Opt for units designed with fire-resistant materials to enhance safety.
- Durability: Ensure the PDU is built to withstand wear and tear, ensuring long-term reliability.
By preparing these tools and materials, individuals can streamline the installation process and enhance the overall safety and efficiency of their power distribution setup.
Preparing the Rack
Before mounting a vertical PDU, individuals must prepare the rack properly. Start by checking the standard dimensions of the rack to ensure compatibility with the PDU. The following table outlines the essential measurements:
| Dimension Type | Standard Measurement |
|---|---|
| Mounting Width | 19 inches |
| External Cabinet Width | 600 mm (24 inches) or 800 mm (31.5 inches) |
| Rack Depth | 600mm, 800mm, 1000mm, 1200mm |
| Height (Rack Units) | 1U = 1.75 inches |
Most server racks typically measure 42U in height and 19 inches in width. Custom solutions exist for unique applications.
Next, assess the environmental conditions within the rack. Maintaining optimal conditions is crucial for equipment longevity. Follow these recommendations:
- Keep humidity levels between 40% and 60% to prevent static and water damage.
- Maintain temperatures between 18°C and 27°C (64.4°F to 80.6°F) to avoid overheating and condensation.
- Use multiple temperature sensors at different heights in the rack for effective monitoring.
By ensuring the rack meets these specifications and environmental conditions, individuals can create a safe and efficient space for their vertical PDU installation. Proper preparation lays the groundwork for a successful setup, enhancing both performance and reliability.
Mounting the Vertical PDU

Mounting a vertical PDU requires careful attention to detail to ensure a secure and efficient installation. Follow these steps to successfully mount your Metered Rack Mount PDU:
- Obtain Mounting Brackets: Start by acquiring a mounting bracket for each end of the vertical PDU. These brackets provide the necessary support for the unit.
- Align the Brackets: Position the mounting brackets with the slots on the vertical PDU. Ensure that they fit snugly and align properly.
- Secure the Brackets: Use screws or fasteners to attach the brackets to the PDU. This step is crucial for stability. The recommended torque for M8 bolts is between 40 to 50 in-lb (4.52 to 5.65 N-m) to ensure a secure fit.
- Position the PDU: Carefully place the PDU in the desired location within the server rack. Make sure it aligns with the vertical rails of the rack.
- Secure the PDU: If necessary, use zip ties or additional fasteners to secure the PDU to the rack. This extra step helps prevent movement and ensures safety.
Tip: Always check the compatibility of the PDU with the rack before installation. Many rack accessories, including vertical PDUs, are proprietary and may not fit all racks. It is advisable to purchase a PDU that explicitly states compatibility with your specific rack.
Vertical PDUs are designed to save space and provide more outlet capacity, making them ideal for high-density environments. They mount to the upright rails or dedicated mounting brackets in the 0U space, allowing for efficient power distribution without consuming valuable equipment mounting space.
| Feature | Description |
|---|---|
| Mounting | Vertical PDUs are mounted to the upright rails or dedicated mounting brackets in the 0U space. |
| Space Efficiency | They save rack space and do not consume equipment mounting space. |
| Outlet Capacity | Vertical PDUs offer more outlets, which is essential for power distribution in data centers. |
When selecting a vertical PDU, consider your rack configuration and space needs. Assess your requirements to choose the best option for optimal outlet support and space savings.
Following these steps will ensure a successful installation of your Metered Rack Mount PDU, enhancing the overall efficiency and safety of your power distribution setup.
Metered Rack Mount PDU Installation Steps
Installing a Metered Rack Mount PDU requires careful execution of specific steps to ensure proper functionality and safety. Follow these detailed steps for a successful installation:
- Lift the PDU: Begin by lifting the Metered Rack Mount PDU. Align the standoff bolts with the keyhole slots on the mounting brackets. Ensure that the circuit breakers face the rear of the rack for optimal access.
- Secure the PDU: For added durability, use a T-25 Torx wrench to secure the PDU to the mounting brackets with shipping screws. This optional step enhances stability during operation.
- Route the Power Input Cords: Carefully route the power input lead cords between the rear RETMA rail and the side panel of the rack. You can choose to route these cords through either the top or bottom of the rack, depending on your setup.
- Install Cable Routing Brackets: Secure cable routing brackets to the rack frame using a T-30 Torx wrench and M6 screws. This step helps maintain organization and prevents cable tangling.
- Secure the Cables: Use tie-wraps to secure the PDU input lead cables to the cable routing brackets. This practice keeps the installation neat and minimizes the risk of accidental disconnections.
- Determine Next Steps: After completing the installation, decide on your next steps. If you plan to install additional PDUs, ensure that you have adequate space and power supply. If you are ready to power on the rack, double-check all connections and settings.
Following these steps will ensure a successful installation of your Metered Rack Mount PDU, enhancing the overall efficiency and safety of your power distribution setup.
| Frequency | Tasks |
|---|---|
| Monthly | Visual inspection, load verification, temperature checks, cable management. |
| Quarterly | Dust removal, tightening connections, testing breakers, verifying network settings. |
| Annual | Infrared scans, firmware updates, load data review, monitoring tests, grounding checks. |
| Every three years | Evaluate replacement, technology upgrades, power quality analysis, capacity reassessment. |
Regular maintenance is crucial for the longevity of your Metered Rack Mount PDU. Following a maintenance schedule ensures that the unit operates efficiently and safely.
Cable Management Tips
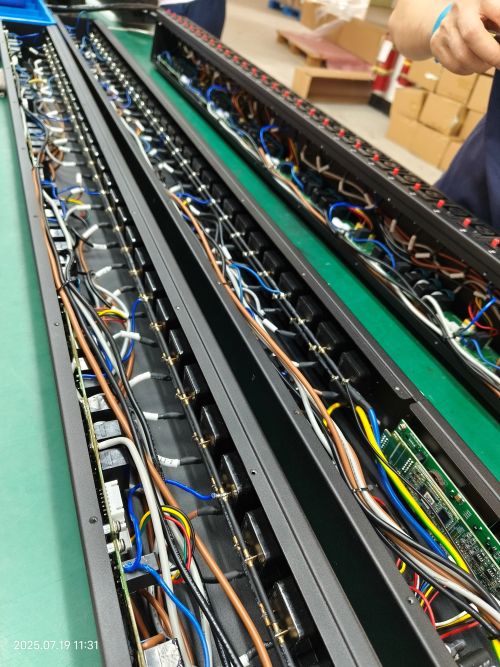
Effective cable management is crucial for maintaining an organized and efficient rack setup. Properly managed cables enhance airflow, reduce clutter, and simplify maintenance. Here are some essential tips for managing cables in vertical PDU installations:
- Use of Cable Ties or Velcro Straps: Bundling and securing cables improves organization and airflow. Velcro straps are reusable and less damaging than traditional zip ties, making them a preferred choice.
- Grouping Cables: Organize cables based on their function or destination. This practice simplifies maintenance and troubleshooting, allowing for quicker identification of issues.
- Labeling Cables: Clearly label each cable to reduce confusion. This step saves time during repairs or upgrades, ensuring that technicians can quickly locate the necessary connections.
- Securing Cables Along Edges: Position cables along the edges of the rack. This method optimizes airflow and prevents obstruction, enhancing overall efficiency.
- Installing Blanking Panels: Use blanking panels to improve ventilation. These panels help maintain optimal temperatures within the rack, preventing overheating.
Additionally, consider these routing techniques to minimize interference:
- Planning: Assess the layout and determine efficient paths for cables before installation.
- Segregation: Separate power lines from data lines to minimize interference.
- Accessibility: Ensure wires remain easily reachable for maintenance and troubleshooting.
By implementing these cable management strategies, individuals can create a more organized and efficient environment for their vertical PDU installations.
Common Mistakes to Avoid
When installing a vertical PDU, individuals often encounter several common mistakes that can lead to inefficiencies or safety hazards. Awareness of these pitfalls can enhance the installation process. Here are key mistakes to avoid:
- Choosing the Wrong PDU: Selecting an inappropriate power distribution unit can cause malfunctions. Ensure the PDU meets the power requirements of all connected devices.
- Improper Mounting: Securely mount vertical PDUs using the correct brackets. This step is crucial for stability and prevents the unit from shifting during operation.
- Neglecting Connections: Connect devices carefully to avoid overloads. Verify all connections after installation to ensure proper functionality.
- Ignoring Rack Balance: Install vertical PDUs on both sides of the rack. This practice balances power distribution and prevents congestion.
- Using Long Power Cables: Short power cables reduce clutter. Fold and tie them with zip ties to maintain organization.
- Mislabeling Cables: Properly label power cables at both ends. This labeling facilitates quick identification of cable origins and destinations.
- Opting for Horizontal PDUs: Avoid horizontal PDUs in tight spaces. They can obstruct airflow and complicate cabling.
By steering clear of these mistakes, individuals can ensure a smoother installation process. Proper planning and execution lead to a more efficient and safe power distribution setup.
Troubleshooting Issues
When users encounter issues with their vertical PDUs, they can follow a systematic approach to identify and resolve problems. Here are typical troubleshooting steps for addressing power issues:
- Verify that the component’s power supply unit (PSU) operates correctly.
- Check that all building power input mains to the PDUs have power. Inspect the building’s electrical circuit panel to ensure that none of the breakers for the PDU inputs are off.
- Determine if a PDU circuit breaker has tripped.
- If these steps do not resolve the issue, consider replacing the PDU.
In addition to these steps, users can utilize various diagnostic tools to identify faults in vertical PDU setups. Recommended tools include:
- Waveform capture devices to detect power quality issues, such as current surges during power supply failures.
- Intelligent rack PDUs with built-in advanced power quality metrics that monitor both inlet and outlet levels.
- External power quality meters for continuous monitoring, capable of detecting voltage sags, swells, and measuring harmonic power flow.
By following these troubleshooting steps and utilizing the right diagnostic tools, users can effectively address issues with their vertical PDUs. This proactive approach ensures reliable power distribution and enhances the overall efficiency of the rack setup.
In summary, mounting a vertical PDU involves careful alignment, secure fastening, and effective cable management. Key best practices include:
- Outlet Configuration: Utilize staggered outlets for maximum availability.
- Safety Reminders: Ensure proper alignment and use ESD wrist straps during installation.
Readers are encouraged to share their experiences and tips. Remember, maintaining safety and organization is crucial for efficient power distribution.
Post time: Sep-20-2025


